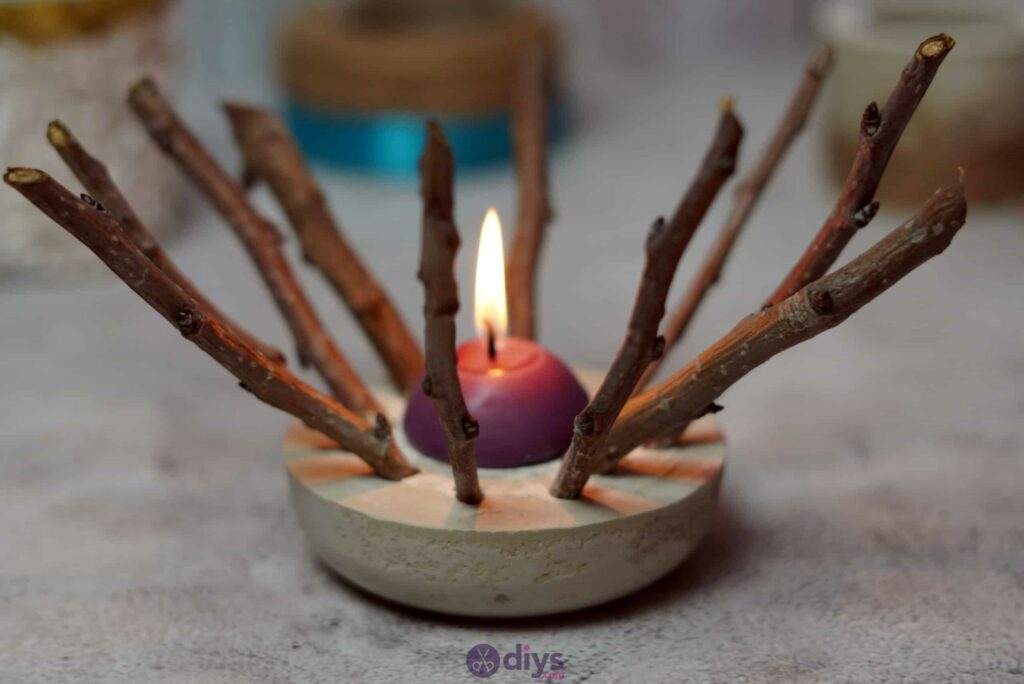
Candle Made from Concrete and Twigs
Wow your guests when they visit with this quirky and unique DIY candle made rom concrete and twigs. You could keep them small to decorate your shelves, or make a big version for a centerpiece. Read on to encounter simply how nosotros put this together.
With literally some sticks and concrete, you tin can make this super cool candle for your home or equally a gift for a friend. Check out these footstep by step instructions complete with photos or keep scrolling to the bottom if you lot'd prefer to see a video tutorial instead!
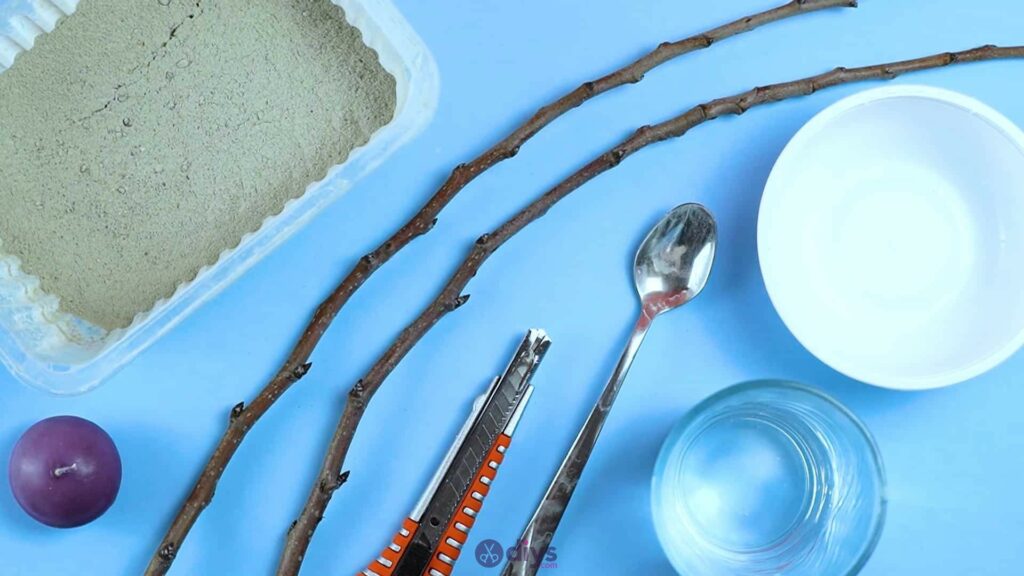
For this project, you'll need:
- Fine particle cement mix
- H2o
- Plate
- Spoon
- Tape
- Oil
- Branch
- Secateurs
- Plastic bowl
- Candle
- Pair of scissors
- Folding utility knife
Footstep 1: Gather your materials!
Make sure to double cheque that listing and gather all your things before you lot begin.
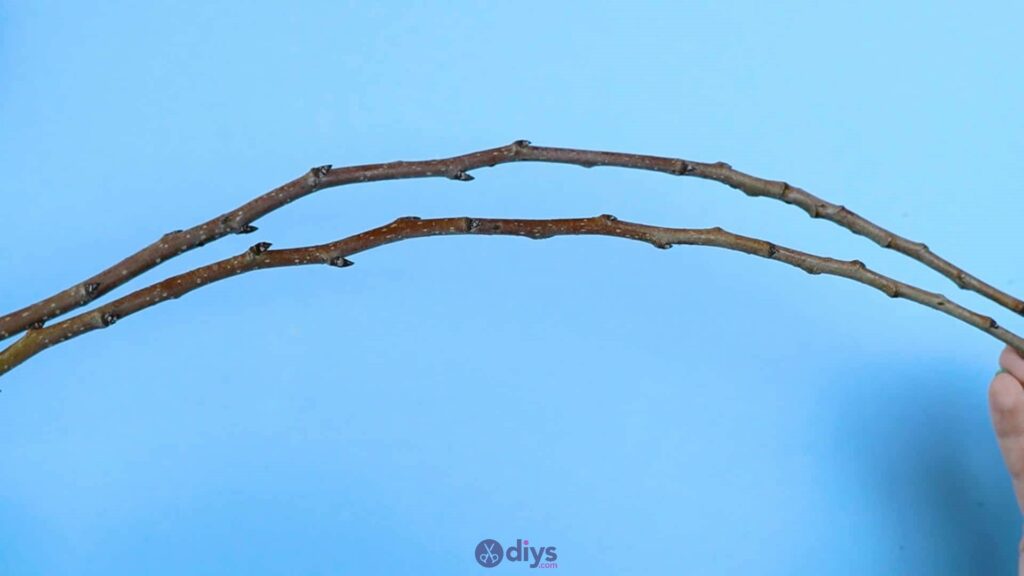
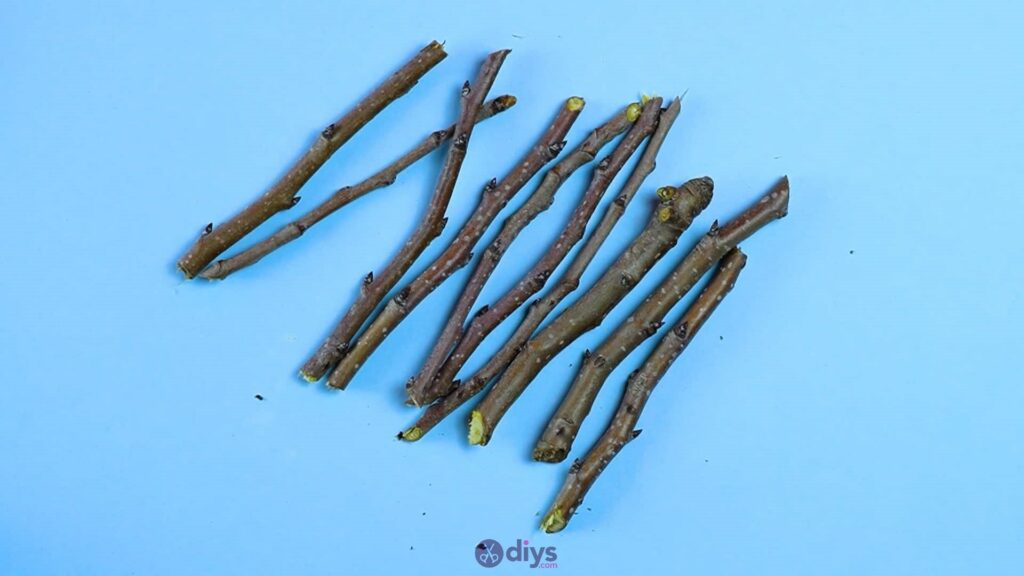
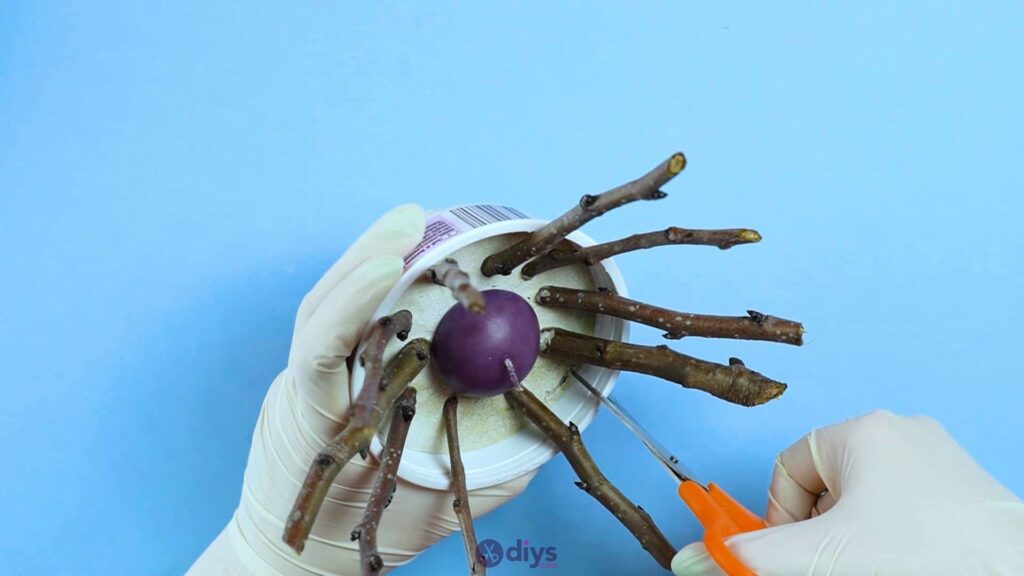
Pace 2: cut the twigs
Use your secateurs to cutting your twigs into pieces. You tin make them whatever length you please, but effort to make all of your pieces roughly the same size. I let mine very a lilliputian bit, but I didn't want to make any as well long or as well short because I wanted to keep the weight distribution however the piece would sit correctly and not tip. The concrete weights the finished product downwardly well, but it's still important to consider all factors.
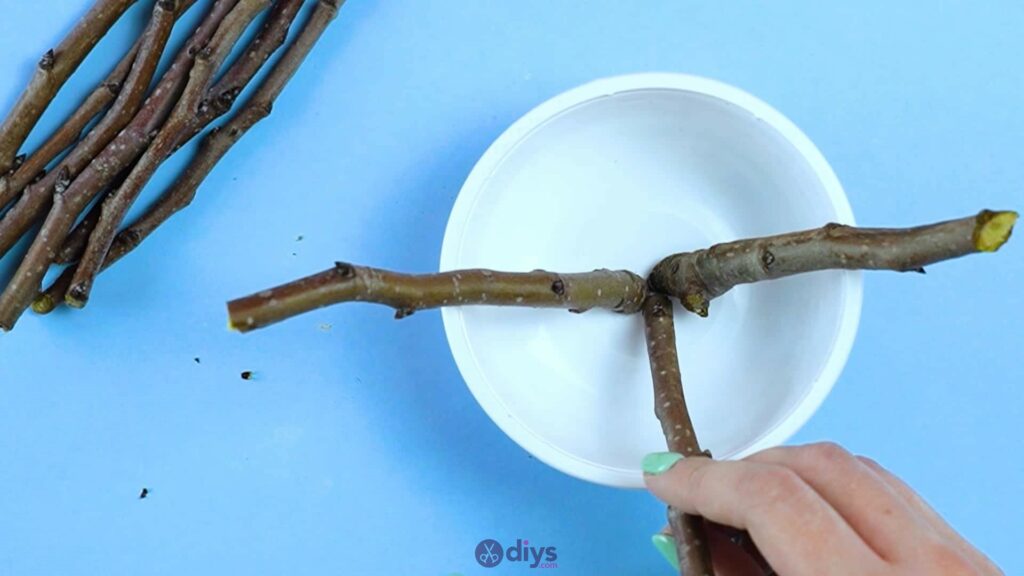
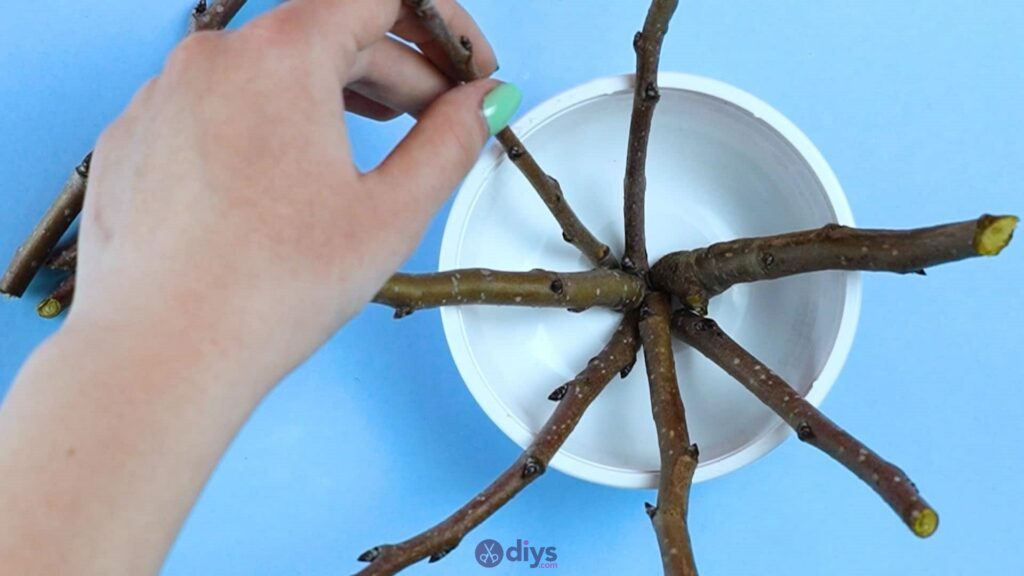
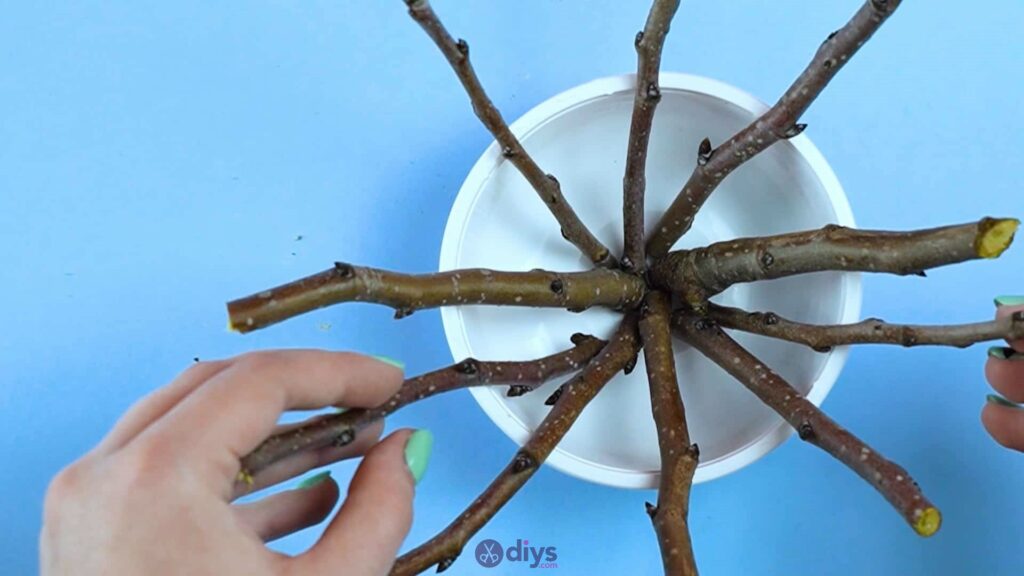
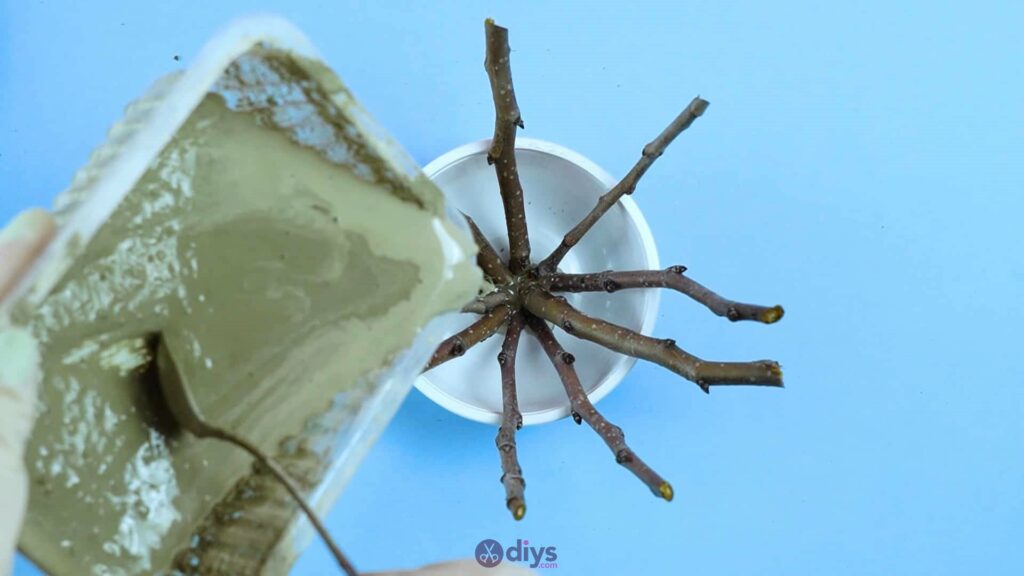
Step 3: accommodate twigs
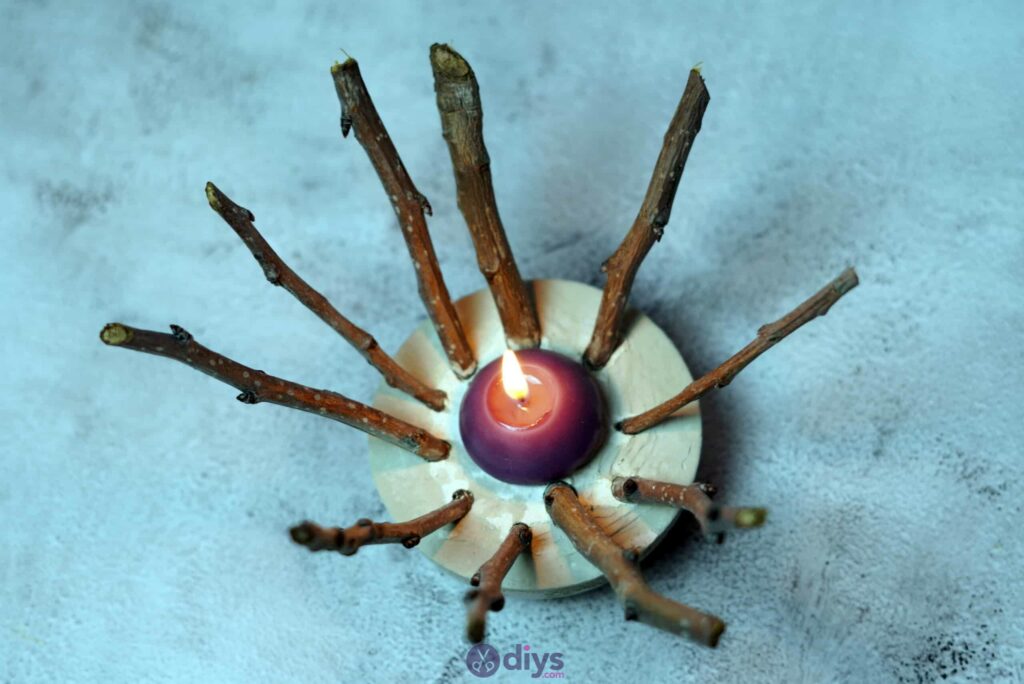
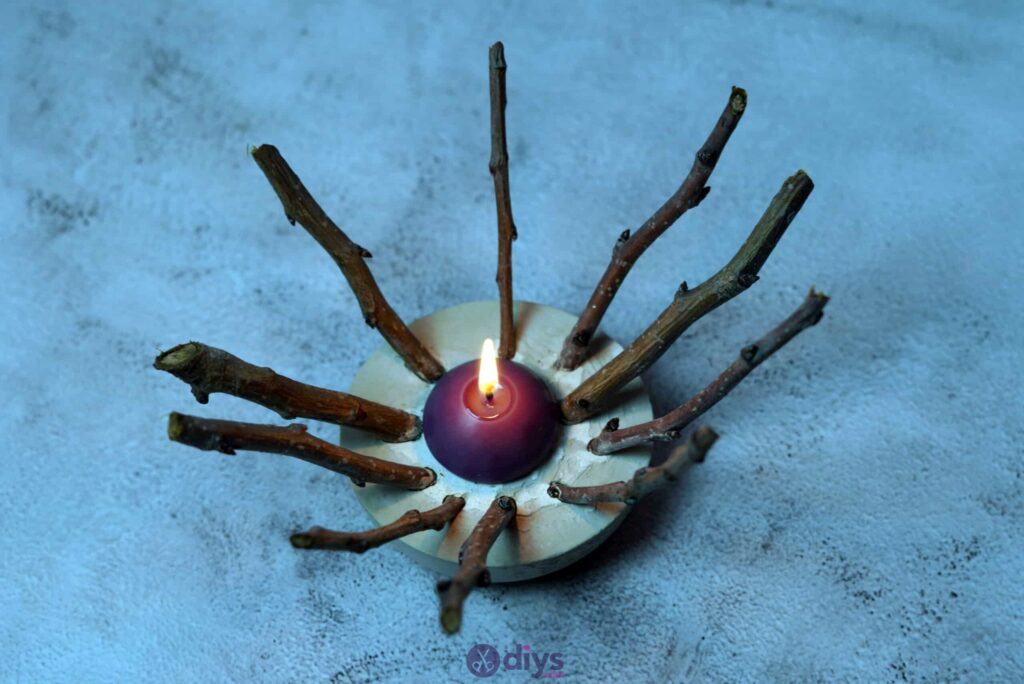
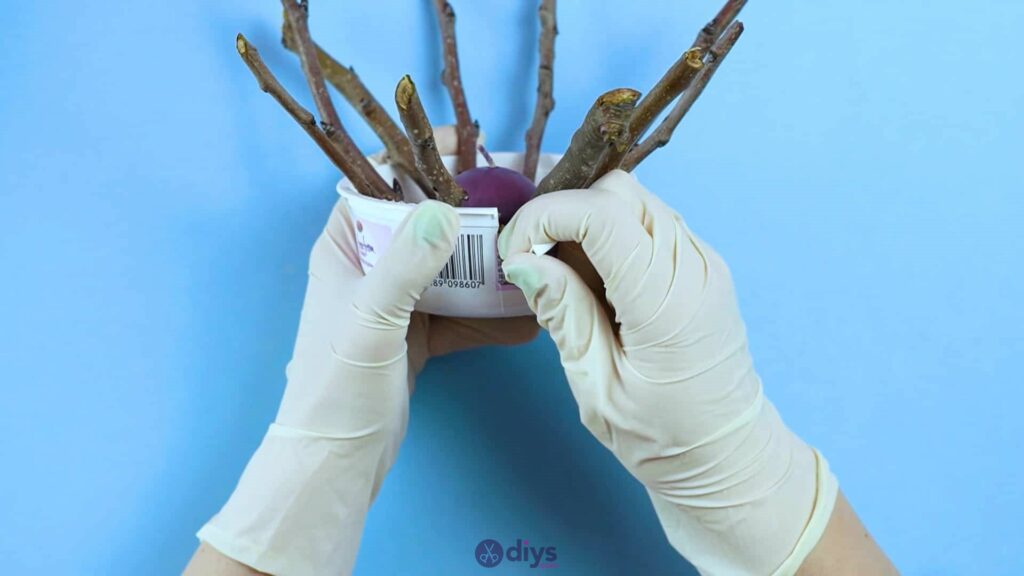
In the plastic bowl that you're going to mould your concrete base of operations in, conform your twig pieces. You lot want to stand them up on their ends, angled slightly then that all the ends meet in the middle at the lesser and stick out the sides. Prepare them and then they stick out all the manner around and conform them until you're happy with the look. You'll be able to move them around a petty later even once the concrete mix is in, so you'll still be able to brand changes then, but y'all won't be able to move them effectually anymore one time the concrete starts drying; I'd advise getting the wait you want at the start.

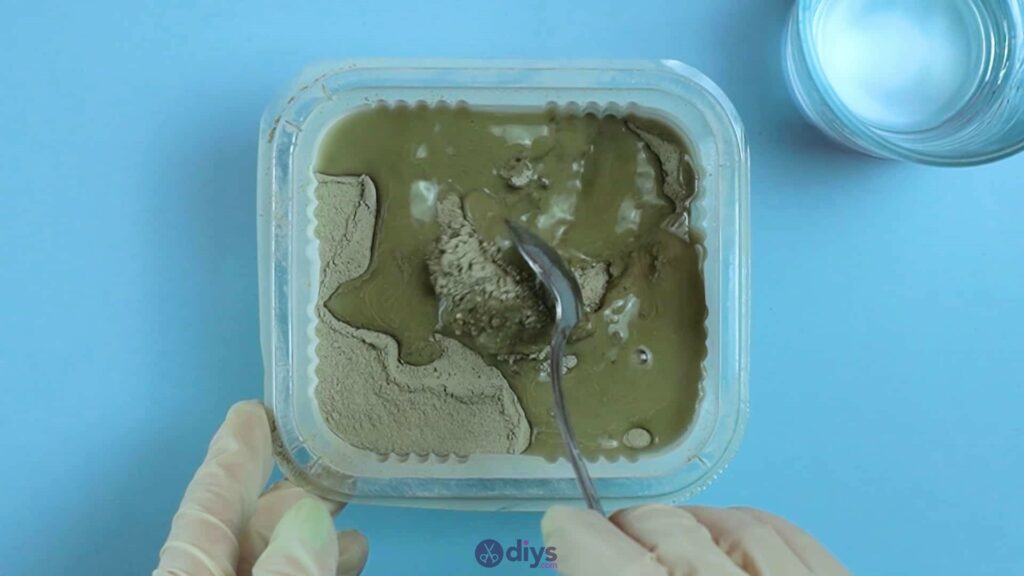
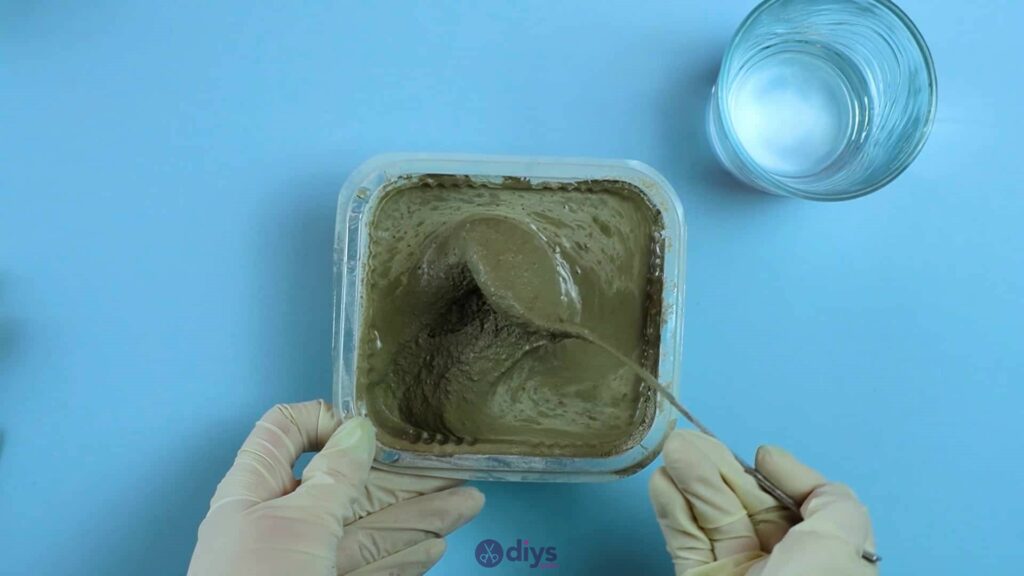
Stride four: mix concrete
Add water to your fine particle cement mix and use your spoon to mix it to the right consistency. You want to do this mixing process in a different plastic container (I use disposable ones that I've saved from the recycling box for this step and the 1 above). Check the dorsum of your cement's packaging to make certain y'all get the correct ratio of powered mix to water for that kind; it can vary. You'll observe that I'm wearing gloves to work with the cement; most DIY cement mixes aren't actuallythat harmful to your skin, but information technologytin be a difficult substance to wash off and it can also dry out your peel out or irritate it if you're very sensitive, then I decided to play things safe and make clean.

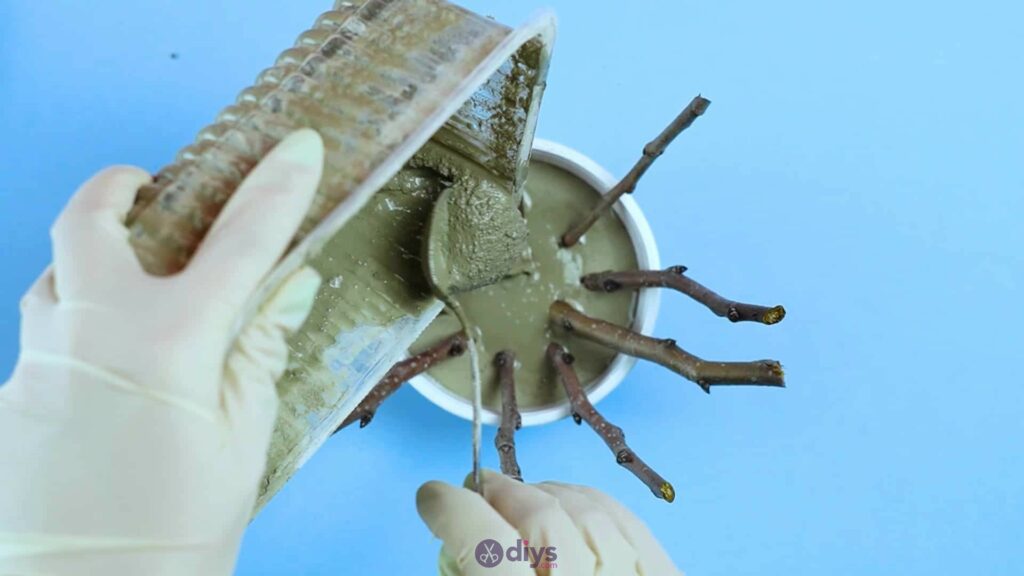
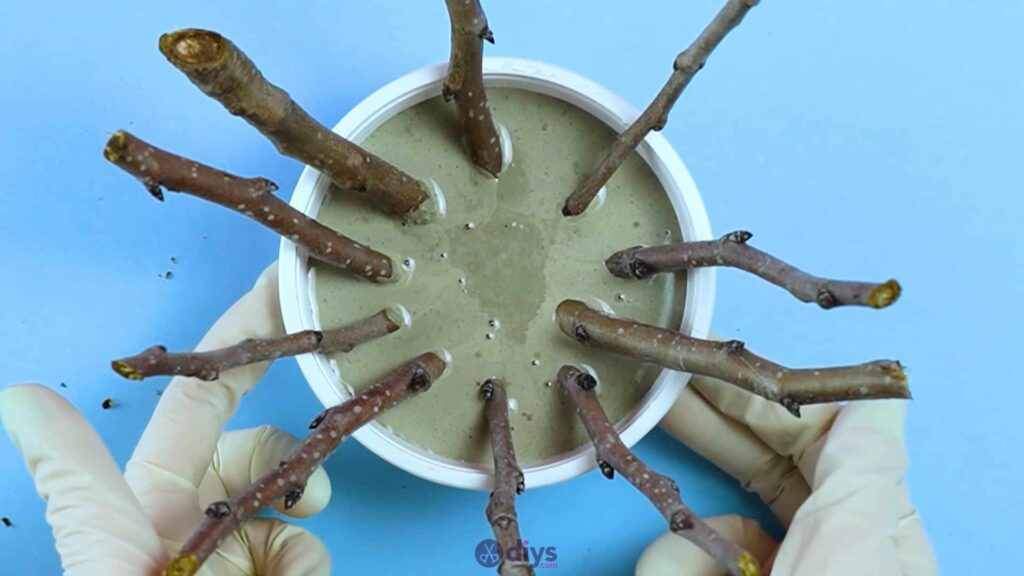
Step v: pour
Pour your cement mix into the container that yous arranged your sticks in, pouring information technology correct over the bottom ends of the sticks where they meet each other in the middle. You can utilise your spoon to aid you get a more even pour and actually scrape all the excess out. Once y'all've poured it all in, tap the sides of the tub lightly to get rid of air bubbles and even out the top, or use your spoon to smooth the mix.
Stride half-dozen: set up it
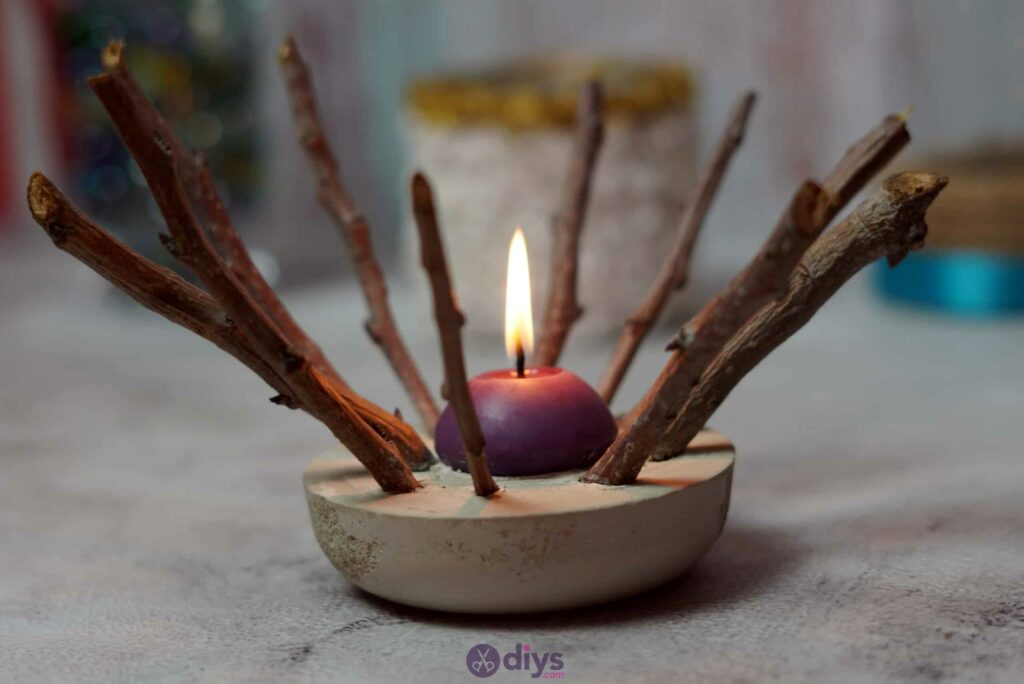
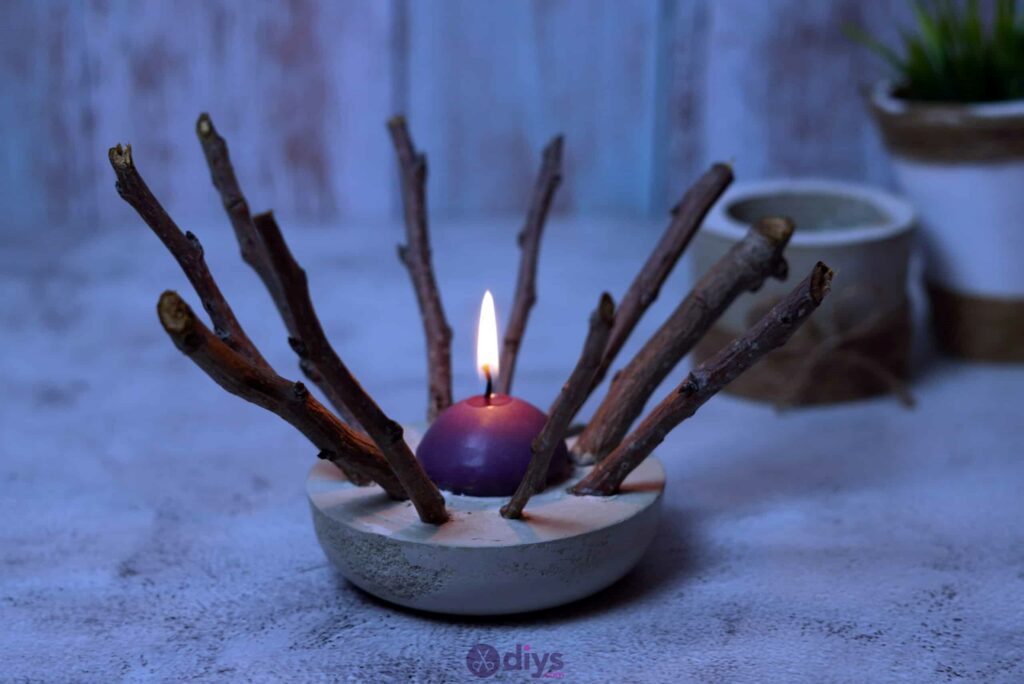
Set up your candle in the centre of your piece while your cement mix is notwithstanding wet. I set up mine right in the middle of the band of twigs around the edge and settled information technology into the mix so that it was in well but not sunk so far down that cement would get on the candle's wick. When you're happy with the placement of the candle, set the whole projection bated to dry.

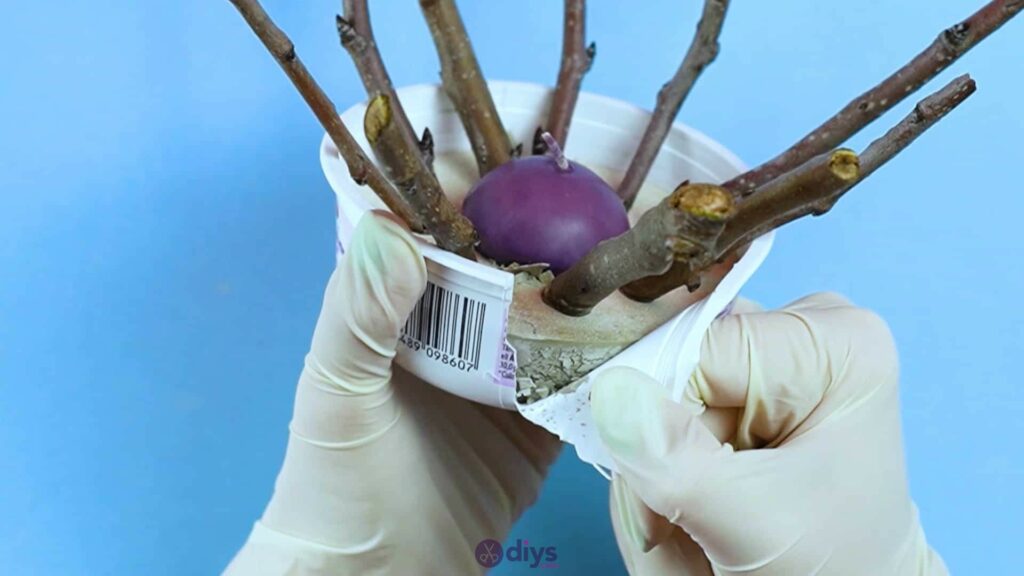
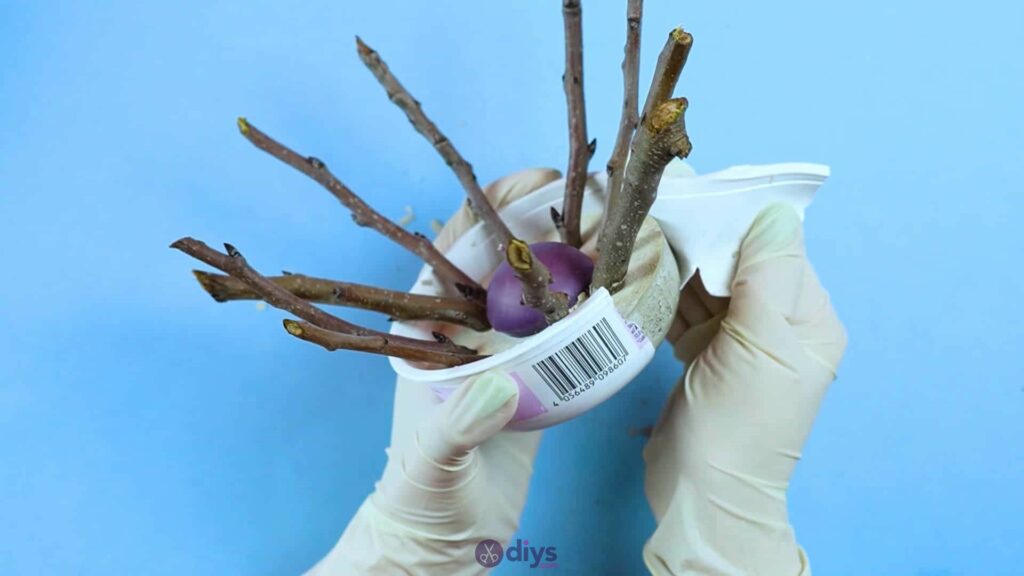
Step seven: peel away class
Once your slice has dried thoroughly and all the way through, use your pair of scissors to make a cut in the edge. This volition permit you pull the disposable plastic tub apart and away from the concrete in gild to make things a little easer to remove. Pull dorsum all of the plastic and gratuitous your physical piece from the container. If y'all want, you can use a piece of sandpaper or an abrasive cake to shine the exterior surfaces and sides of your concrete piece, removing whatever crude spots or sanding downwards any inconsistencies.

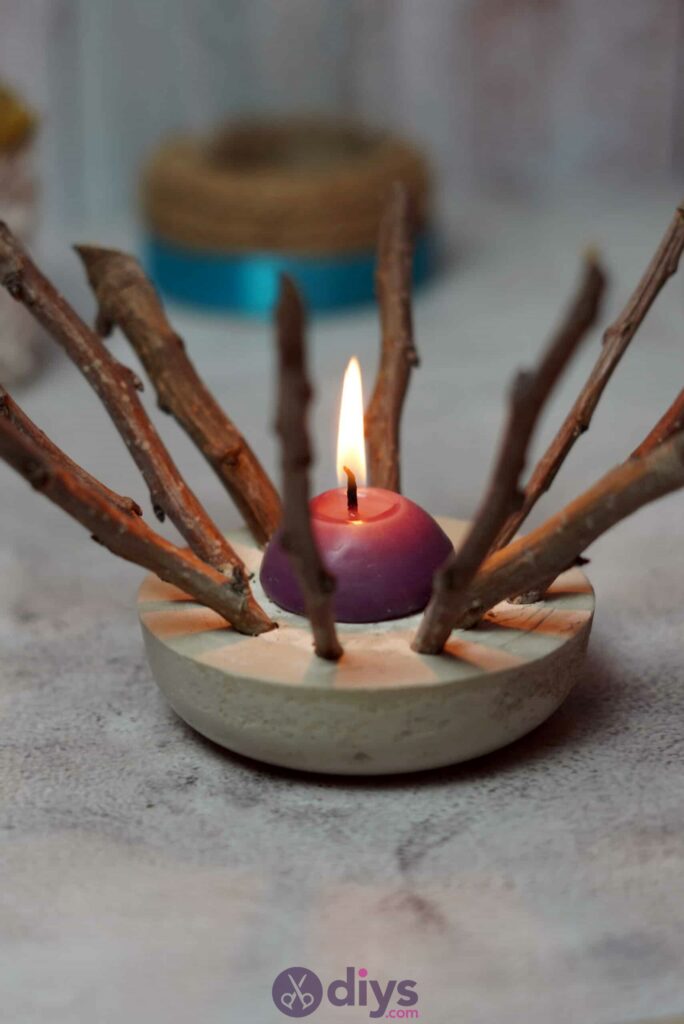
And in that location yous have it! Your forest and concrete candle holder is all finished. You can experience gratis to customize your pieces further from here besides; painting or embellishing it, for example, could transform information technology and add some personality. Just in case you'd like to try this project out for yourself, here's a fantastic tutorial video to help you!
Source: https://www.diys.com/concrete-and-twigs-candle/
Post a Comment for "Candle Made from Concrete and Twigs"